
Guinea pigs are adorable, social creatures that make wonderful companions. They are highly active and playful, requiring ample space to exercise and explore. Providing adequate housing for your furry friends is essential for their well-being. While commercial cages are available, building your own DIY guinea pig cage offers several advantages. You can customize the size, shape, and materials to suit your specific needs and preferences, ensuring that your guinea pigs have the most comfortable and enriching environment. This comprehensive guide will walk you through every step of the process, from planning and materials to assembly and maintenance.
Seemore: Can Guinea Pigs Eat Asparagus? – A Complete Guide
Contents
Planning Your DIY Guinea Pig Cage
Before embarking on your cage-building project, it’s crucial to carefully plan the design. Consider the following factors:
Size
Guinea pigs require a spacious cage to roam freely. The minimum recommended size for a pair of guinea pigs is 7.5 square feet, although larger is always better. Keep in mind that guinea pigs are highly active and need plenty of room to run, play, and explore. A larger cage also allows for more enrichment activities, such as adding tunnels, ramps, and hiding spots.
When determining the size of your DIY guinea pig cage, consider the number of guinea pigs you have and their individual personalities. Some guinea pigs may be more territorial and require more space, while others may be content with a smaller area. As a general rule, aim for at least 10-12 square feet for two guinea pigs, and an additional 2-4 square feet for each additional guinea pig.
Shape
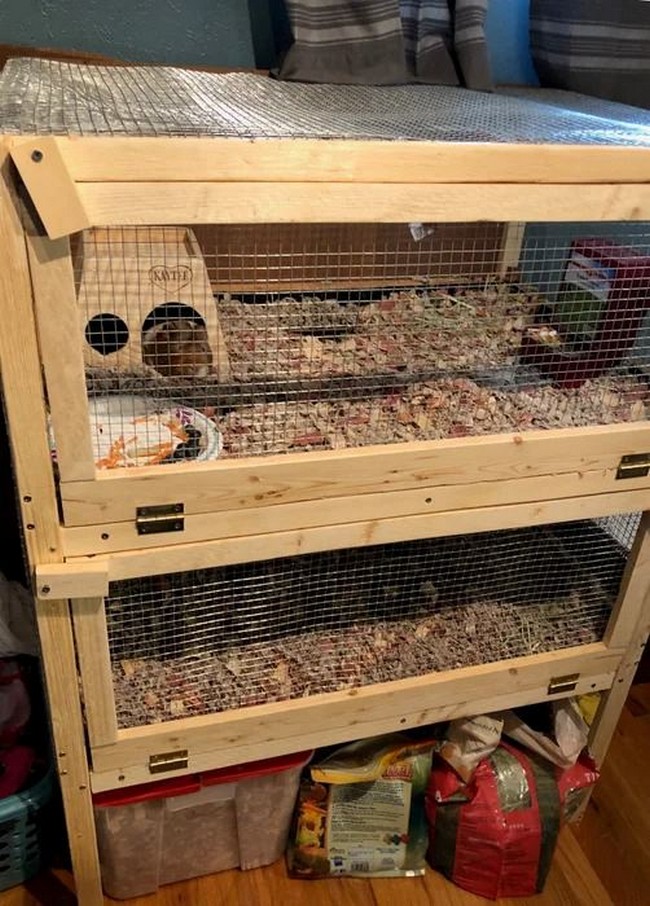
Rectangular or square cages are the most common, but you can also consider other shapes that optimize space utilization or complement your home décor. For example, a corner cage can fit nicely in a small room, while a multi-level cage can provide more vertical space for your guinea pigs to explore. Just make sure that the shape you choose allows for enough floor space for your guinea pigs to move around comfortably.
Materials
Choosing the right materials is crucial for the safety and comfort of your guinea pigs. Here are some popular options for DIY guinea pig cages:
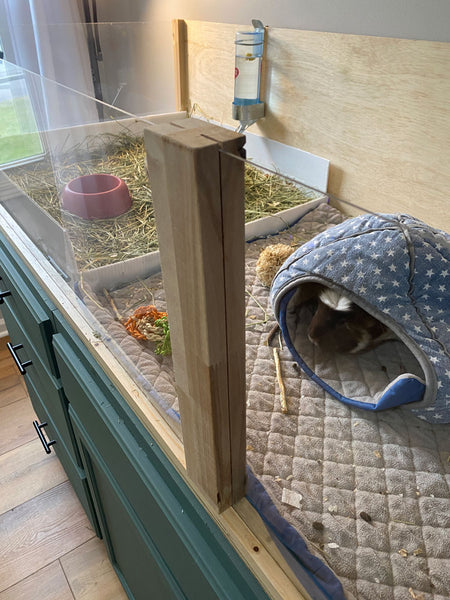
- Wood: Wood is a common material used for building guinea pig cages, as it is sturdy, easy to work with, and provides a natural look. However, not all types of wood are safe for guinea pigs. Avoid using cedar or pine, as they contain aromatic oils that can be harmful to small animals. Instead, opt for untreated pine, fir, or spruce.
- Coroplast: Coroplast, also known as corrugated plastic, is a lightweight and durable material often used for the base of guinea pig cages. It is easy to clean and provides a smooth surface for your guinea pigs to walk on. You can purchase coroplast sheets at most home improvement stores.
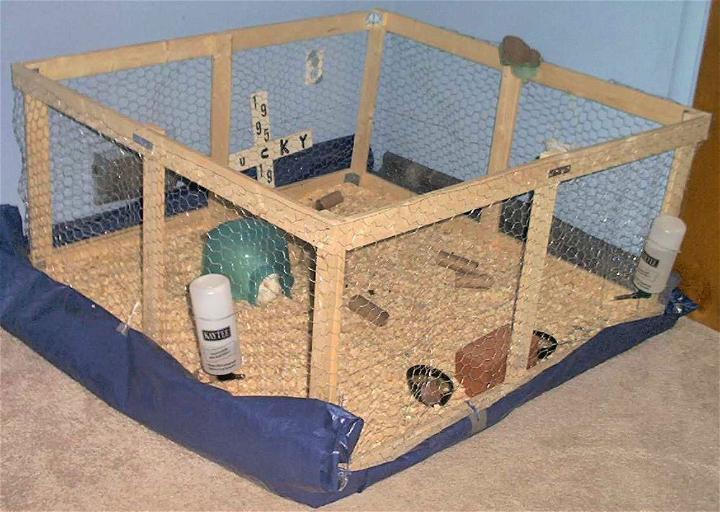
- Mesh: Mesh wire is commonly used for the sides of guinea pig cages, as it allows for proper ventilation and visibility. Make sure to choose a mesh with small enough holes to prevent your guinea pigs from escaping or getting their heads stuck. Galvanized steel or PVC-coated mesh are good options.
- PVC pipes: PVC pipes can be used to create tunnels and hideouts in your guinea pig cage. They are affordable, easy to find, and safe for your guinea pigs to chew on. Just make sure to wash them thoroughly before use.
Ventilation
Adequate ventilation is essential to maintain air quality and prevent respiratory issues in your guinea pigs. Make sure that your DIY guinea pig cage has enough openings for fresh air to circulate. This can be achieved through mesh sides, windows, or vents. Avoid using solid walls or materials that do not allow for proper air flow.
Cost
Building your own DIY guinea pig cage can be more cost-effective than purchasing a commercial one. However, the cost will depend on the materials you choose and the size of the cage. It’s important to keep in mind that investing in a larger, high-quality cage for your guinea pigs is an investment in their health and well-being.
Materials and Tools Needed
Now that you have a better understanding of the factors to consider when planning your DIY guinea pig cage, let’s take a look at the materials and tools you will need for the project:
Materials:
- Wood (untreated pine, fir, or spruce)
- Coroplast sheets
- Mesh wire
- PVC pipes
- Screws
- Nails
- Zip ties
- Wood glue
- Non-toxic paint or stain (optional)
Tools:
- Saw
- Drill
- Screwdriver
- Hammer
- Measuring tape
- Pencil
- Sandpaper
- Wire cutters
Building Your DIY Guinea Pig Cage

Now that you have all the necessary materials and tools, it’s time to start building your DIY guinea pig cage. Follow these steps for a successful construction process:
Step 1: Cut the Wood
Using a saw, cut the wood pieces according to the measurements of your chosen cage design. Make sure to sand down any rough edges to prevent your guinea pigs from getting splinters.
Step 2: Assemble the Base
Lay out the wood pieces on a flat surface and use screws or nails to secure them together. This will form the base of your cage. If you plan on adding multiple levels, make sure to leave enough space between each level for your guinea pigs to climb up and down.
Step 3: Create the Walls
Cut the coroplast sheets to fit the dimensions of your cage base. Use zip ties to attach the coroplast sheets to the wood frame, leaving one side open for access.
Step 4: Add Mesh Sides
Using wire cutters, cut the mesh wire to fit the dimensions of the open side of your cage. Attach the mesh to the wood frame using screws or nails. Make sure to leave a small opening for a door.
Step 5: Create a Door
To create a door, cut a section of the mesh wire slightly larger than the opening and attach it to the frame using hinges. You can also add a latch or hook to keep the door securely closed.
Step 6: Add PVC Pipes (Optional)
If you want to add tunnels or hideouts to your guinea pig cage, use PVC pipes to create them. Cut the pipes to the desired length and attach them to the cage using zip ties or wood glue.
Maintaining Your DIY Guinea Pig Cage
Congratulations, you have successfully built your own DIY guinea pig cage! Now, it’s important to maintain it regularly to ensure the health and happiness of your guinea pigs. Here are some tips for keeping your cage clean and safe:
- Spot clean daily: Remove any soiled bedding, uneaten food, and droppings from the cage on a daily basis.
- Deep clean weekly: Once a week, remove all the bedding and wash the coroplast base with mild soap and water. Rinse thoroughly and let it dry completely before adding fresh bedding.
- Replace bedding regularly: Guinea pigs are prone to respiratory issues, so it’s important to replace their bedding at least once a week to prevent ammonia buildup.
- Check for wear and tear: Regularly inspect your cage for any signs of damage or wear and tear. Replace any damaged parts immediately to prevent injury to your guinea pigs.
- Provide enrichment: Keep your guinea pigs mentally stimulated by adding new toys, tunnels, and hiding spots to their cage regularly.
Conclusion

Building your own DIY guinea pig cage is a fun and rewarding project that can provide your furry friends with a comfortable and enriching environment. By carefully planning the design, choosing safe materials, and following the steps outlined in this guide, you can create the perfect home for your guinea pigs. Remember to regularly maintain and clean the cage to ensure the health and happiness of your beloved pets. Happy building!